How To Use AR and VR with CAD Models | Why Is It Necessary?
Imagine being able to walk into your CAD model, inspect every joint in full scale, and make decisions before a tool even hits the shop floor. That’s the reality for many forward-looking engineering teams. With the global AR/VR software market expected to swell from around US$32.5 billion in 2023 to over US$77.5 billion by 2028 at a CAGR of roughly 19 %, immersive technologies are no longer a sci-fi novelty. They’re becoming design-engineering tools. In the manufacturing world, AR/VR use in design, simulation and training is forecasted to reach roughly US$8.3 billion in the near future, and heading toward the tens of billions in the next decade.
Yet many CAD workflows remain locked into flat-screen reviews, endless drawings and physical mock-ups. Layering AR/VR onto CAD models changes the game: it enhances spatial understanding, accelerates stakeholder buy-in and shrinks costly physical prototypes. This blog explores why combining AR/VR with CAD is now essential and how to do it: from file export tricks to platform choices and real-world use cases. If you’re an engineer, product manager or CAD specialist wondering how to redefine your workflow, this post will show you exactly how to make AR/VR part of your CAD toolbox.
What Does “AR/VR With Cad” Mean? Quick Definition
Okay, so when people say AR or VR with CAD, it is not fancy magic. It is basically taking a 3D model and somehow putting it somewhere you can see it. Sometimes in a room. Sometimes you can step inside it. You are not just looking at it. You notice how it fits. You notice things that are weird or off.
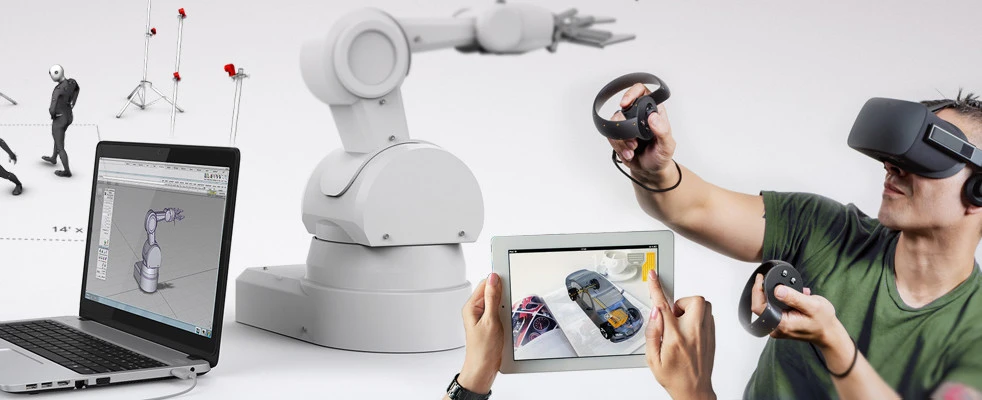
- Augmented Reality or AR is when the model shows up in the real world. You open an app. You put on glasses. Boom, the machine or layout is there. You can move around. You can look from the side. You can get really close. You can see if it collides with something or fits weirdly. You notice stuff you would not on a flat screen.
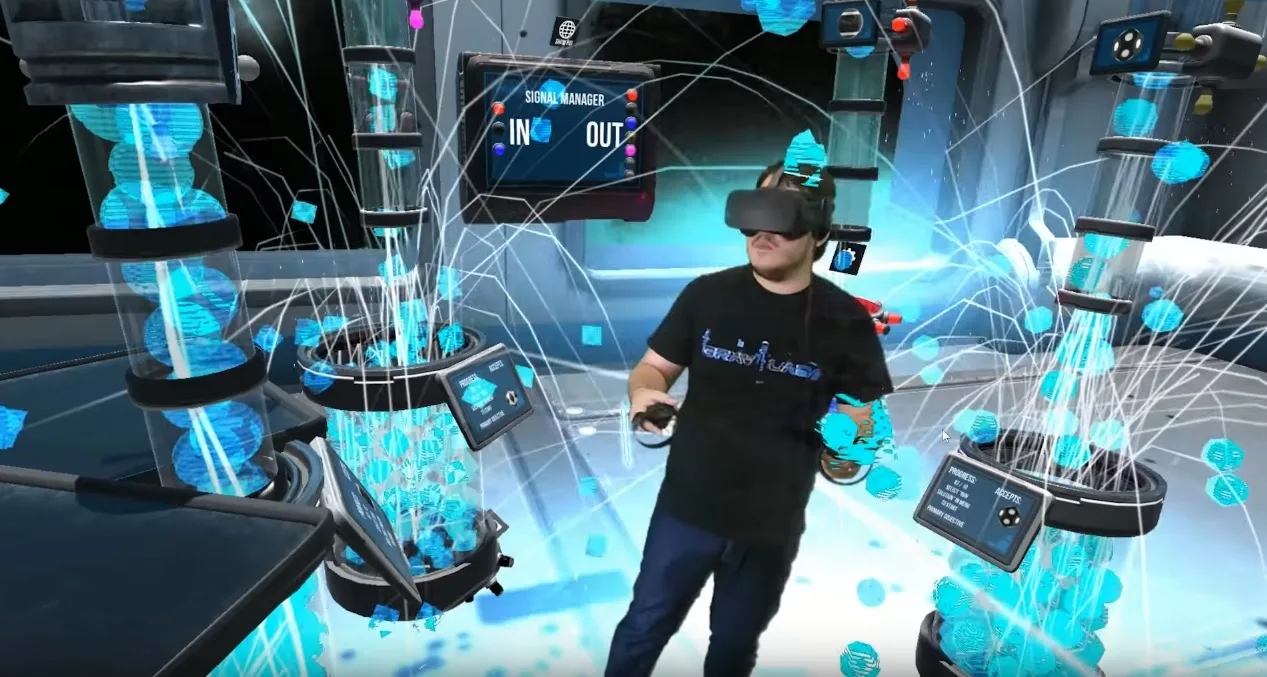
- Virtual Reality or VR is different. You are inside it. Completely inside. You can walk around. You can test how someone would move. Reach things. Fit things. Check ergonomics. It is like the model exists but only for you. Nothing real moves, but it feels like it does.
- Mixed Reality or MR is in between, sort of. You can interact with the model. It stays in the room. You can move it. Rotate it. Touch it in a way. It looks anchored. Feels like it belongs there.
So yeah, AR, VR, MR with CAD is just a way to understand your design better. You see things earlier. You notice stuff. You can try ideas without building them. It makes mistakes obvious before they cost anything. It is not perfect. You will fumble a bit. But it shows you stuff screens never will.
Usually, AR is great for on-site visualization. It helps during installation, training, or maintenance. VR works better during design and testing when you need to feel scale or space.
Top Business Use Cases (Industry Examples)
People sometimes talk about AR and VR like they’re futuristic toys. However, in real industries, they’re already saving serious time and money. Here’s where they’re quietly changing the way work gets done.
1. Manufacturing & Assembly Line Simulation (Digital Twin)
Factories are using VR versions of their production lines before the first bolt is tightened. Engineers walk through the process virtually, spot layout issues, even simulate worker movement. The result? Fewer physical prototypes and faster setup. In some plants, prep time has dropped by 30–40% because problems are caught before equipment arrives.
2. Construction & AEC
In construction, you can hand a client a VR headset and let them “walk” their building months before it exists. AR adds another layer. It overlays models on the real site to catch clashes between pipes, ducts, and walls. Firms report up to 50% fewer coordination errors. This means fewer reworks and smoother handoffs.
3. Product Design & Ergonomics
Design teams use VR to test how people actually interact with products. They can check comfort, reach, and usability without waiting for a prototype. It’s simple but powerful. One automotive company cut mockup costs by nearly 60% after moving early ergonomics testing into VR.
4. Field Service & Remote Assistance
Imagine a technician on-site wearing AR glasses. These will show step-by-step repair guidance or highlight the next part to inspect. Remote experts can see exactly what the technician sees. Besides, they can offer help instantly. That kind of setup reduces downtime, improves fix rates, and shortens training cycles. Some teams have seen training time drop by 25% or more.
5. Sales & Marketing
Sales teams use AR to drop life-sized products right into the customer’s space. No shipping, no setup, no guessing. VR takes it further with virtual showrooms where clients explore entire product lines. It’s engaging, memorable, and far cheaper than trade show setups. Companies using this approach report higher engagement and shorter sales cycles.
Why It’s Necessary
Let’s be honest, AR and VR aren’t just shiny gadgets anymore. They’re becoming the shortcut button for industries that live and die by time, precision, and cost. The reason’s pretty simple: they let you see and fix problems before they cost anything real.
Take rework, for example. Physical mockups eat up money and time, especially when changes keep rolling in. Using VR, teams can test fit, spacing, and assembly virtually, before a single part is cut. A few hours in a headset can save weeks of rework and thousands in wasted material. Some manufacturers have reported 20–30% faster approval cycles because everyone, from designers to clients, can literally walk through the same model.
Training tells a similar story. Instead of explaining safety procedures with slides, new hires can step into an AR or VR training environment that feels real with no risk, no shutdowns. Immersive training consistently cuts onboarding time by 25–40%, and in some fields, incident rates drop by double digits because workers remember what they experienced, not just what they read.
Remote collaboration is another hidden win. Teams spread across continents can meet “inside” the same CAD model, make changes live, and avoid the endless back-and-forth of screenshots and files. That kind of workflow keeps projects moving and decisions faster. It’s measurable, too. You can track the results through:
- Cycle time: How long a design takes from start to sign-off
- Number of RFIs (Requests for Information): Fewer questions mean clearer communication
- Training hours saved: Less classroom time, more effective learning
Technical Challenges & How To Overcome Them
Of course, none of this is plug-and-play magic. Using AR or VR with CAD models sounds easy until you try loading a full assembly into a headset and your computer groans like it’s lifting a truck. The truth is, the tech’s powerful, but it needs a bit of tuning to behave.
1. CAD Complexity and Heavy Geometry
CAD files aren’t built for real-time rendering. They’re packed with detail, thousands of parts, every fillet and screw thread intact. That’s too much for a VR engine to handle smoothly. The fix? Simplify. Use model optimization, reduce level of detail (LOD) where you can, and apply retopology or tessellation before export. You don’t need every nut modeled when you’re reviewing an assembly flow.
2. Materials, PMI, and Metadata
CAD data isn’t just shapes. It carries surface textures, tolerances, and notes (PMI). A lot of that can get lost in translation. The trick is to use export pipelines that preserve metadata and material assignments, or at least tag key information separately for use in the AR/VR platform. It’s extra work, but it keeps the model useful beyond just visuals.
3. File Formats and Interoperability
Different tools speak different languages. Native CAD might export to FBX, OBJ, or STEP, but AR and VR platforms prefer glTF, GLB, USDZ, or Datasmith. Finding the right pipeline means less cleanup later. Most teams build a repeatable conversion workflow that balances quality and performance.
4. Performance on Mobile vs Tethered VR
A mobile AR app can’t push the same polygon count as a workstation-tethered VR headset. You’ll probably need lighter models, baked lighting, and smaller textures for phones or tablets. Think smart, not heavy! Optimize for what the device can actually show.
5. Security and IP Protection
Last but not least, security. Sharing CAD models outside your firewall can feel risky. Always strip out proprietary dimensions or sensitive geometry before export. Some teams use encrypted viewers or streaming options, so the data never actually leaves secure servers.
Get AR and VR CAD Drafting From Our Team Now!
Step-By-Step Practical Workflow
Getting AR or VR working with CAD isn’t magic. It’s methodical. You just have to follow a few steps and be ready for some trial and error.
Step 1: Set Objectives
First things first. Why are you doing this? Design review, training, field support, sales demos… maybe all of the above. Knowing this upfront shapes everything else. Don’t skip it.
Step 2: Pick the Platform
Where is this going to run? A phone, HoloLens, Oculus Quest, WebXR, or some enterprise AR tool? Each platform has limits. Choose carefully, because it affects performance, file preparation, and interaction design.
Step 3: Prepare the CAD Model
This is where most people stumble. CAD files are heavy. Simplify geometry. Make tessellated meshes. Bake textures. Strip features you don’t need. Add LODs. Use decimators or glTF converters. The goal: keep it recognizable but light enough to run smoothly.
Step 4: Add Semantic Data
Your model isn’t just shapes. Add metadata, PMI, or notes for instructions or digital twin purposes. That info is what makes AR/VR more than just a visual toy.
Step 5: Import into Engine
Bring it into Unity, Unreal, WebXR, or your enterprise AR studio. Set scale. Add anchors. Colliders. Check orientation. One wrong pivot, and everything feels off.
Step 6: Build Interactions & UX
Add exploded views, animations, annotations, and measurement tools. Make it intuitive. Remember: users won’t read a manual because they’ll expect it to “just work.
Step 7: Test on Target Hardware
Latency, occlusion, and lighting, you must test everything. On mobile, you’ll notice frame drops. In tethered VR, check collisions. Iterate until it feels natural.
Step 8: Deploy & Collect Analytics
Go live. Track usage: session times, task completion, errors. That data shows what works, what doesn’t, and where improvements are needed.
Tools & Platforms | Which One To Pick
Choosing the right tool is tricky. There are a lot of options, each with its quirks. Some are high-fidelity but expensive. Others are light and easy but limited. Your choice really depends on what you need it for, who’s using it, and where it’s running.
Here’s a rough guide:
| Tool / Platform | Strengths | Weaknesses | Best For | Notes |
| Unity + AR Foundation | Cross-platform, flexible, large developer community | Needs some coding knowledge; setup can be time-consuming | Mobile AR apps, VR experiences, interactive prototypes | Great if you want to support iOS and Android without rebuilding. Plugins available for CAD imports. |
| Unreal + Datasmith | High-fidelity visuals, strong CAD import support | Steeper learning curve, heavier hardware requirements | Immersive VR design reviews, architectural walkthroughs | Best for photorealistic VR experiences; ideal when visual quality matters more than speed. |
| PTC Vuforia | Enterprise-grade AR, robust CAD integration | Limited flexibility outside supported formats, licensing cost | Manufacturing, assembly instructions, maintenance guidance | Good for teams already in PTC ecosystem; strong tracking for industrial AR. |
| Autodesk Forge & Viewer | Web-based, easy sharing, CAD native support | Visual fidelity lower than Unreal/Unity | Web-based CAD review, client collaboration | Works in browsers, no headset needed; ideal for remote teams. |
| WebXR / 8th Wall | Browser-based AR, quick deployment | Limited high-fidelity rendering, dependent on device | Light AR demos, product visualization | Very easy to share links with clients. No app installs required. |
| Vendor CAD Plugins (Dassault, Siemens, Autodesk) | Direct integration with CAD software | Often limited to the vendor ecosystem | Quick previews, internal design review | Fastest path for internal teams; doesn’t require exporting models. |
How to pick:
- If you care about photo-realistic VR, Unreal + Datasmith is your best bet.
- Need cross-platform mobile AR? Unity + AR Foundation works well.
- Want lightweight, browser-based demos? WebXR or Autodesk Forge is your friend.
- Enterprise team that needs reliable industrial AR? PTC Vuforia.
- Don’t want to mess with exports at all? Stick with vendor CAD plugins.
No tool is perfect, and that’s why most teams end up using two or three together.
Common Mistakes To Avoid
Working with AR or VR and CAD is tricky. People often trip over simple things. Here are some mistakes you want to watch for:
- Exporting full CAD assemblies without simplification
Big models can crash apps or run extremely slow. You don’t need every screw and fillet for visualization.
- Ignoring scale and real-world units
It might look fine on your screen. But in AR or VR, things can feel huge or tiny. Doors too small, machines way too tall.
- Poor user experience for non-technical viewers
Engineers get it, but your clients or operators might not. Confusing menus, unclear gestures, or hidden controls can ruin the experience.
- Skipping iterative testing
People load it once and assume it works. Reality is messy. Check on devices, check with actual users, see what breaks.
- Forgetting metadata or instructions
A model without notes or labels can confuse users. Sometimes the visuals alone aren’t enough.
Keep it simple. Test often. And remember, AR/VR is supposed to make life easier, not more confusing.
Faqs
- What is the difference between AR and VR for CAD?
AR puts your CAD model on top of the real world. VR puts you inside it. You can walk around or inspect parts virtually. AR is better for on-site work, VR is better for checking the design itself.
- How do I convert a CAD model into AR?
First, export it to a simpler format like glTF or USDZ. Remove unnecessary details. Then bring it into an AR platform. Test it on the device you’ll use. Things rarely work perfectly the first time.
- Which file formats work best for AR/VR from CAD?
glTF, GLB, FBX, and USDZ are common. They keep things light enough to run. Native CAD formats usually don’t work directly. You need to convert them first, or the headset or phone will choke.
- How do I optimize CAD models for mobile AR?
Simplify geometry. Reduce polygons. Remove tiny parts. Bake textures. Make LODs. Phones and tablets can’t handle huge files. Smaller models load faster and don’t lag. Testing is essential.
- Can SolidWorks models be used in VR?
Yes, but they need exporting first. Heavy assemblies often need simplification. Then you can import them into a VR engine. Once inside, you can check fit, scale, or walk through the design.
- When should I use AR instead of VR with CAD?
Use AR when you’re on-site, installing something, or giving instructions. VR is better when you need to explore a full model, check ergonomics, or review a design before building anything.
- How do I measure the ROI of AR/VR for CAD?
Look at real things. Faster approvals. Fewer mistakes. Less training time. Reduced rework. Count hours saved, errors avoided, or prototypes not built. Numbers like that show if it’s working or not.
Conclusion
Using AR and VR with CAD is not just about new technology. It lets you see things before they exist. You can find problems early. You can train people faster. You can understand designs better.
If you want to try it yourself there is a sample glTF viewer. You can open a model, rotate it, and get a feel for how it works in three dimensions. It is a small step but it shows how designs can feel real before they are built.
If your team needs help creating AR or VR experiences or just wants clean CAD drafts, you can get a quote from us. We can talk through what will work best for your project.
Try it out. Look at a model in space. See what changes. Sometimes just moving around a design gives you new ideas and makes the next steps easier.