5 Common CAD Drafting Mistakes (and How to Fix Them)
Every drafter has faced a moment. You zoom in, zoom out, double-check a detail, and still can’t figure out why something looks off. Maybe the dimensions don’t line up. Maybe the block inserts at a strange scale. Sometimes, the smallest misstep in CAD can snowball into massive rework.
A recent industry report revealed that nearly 29% of project reworks in design teams come from simple drafting errors. Most of them aren’t dramatic blunders. They’re quiet, everyday mistakes that slip through when deadlines get tight and attention drifts. Missed units. Unnamed layers. Forgotten standards. It all adds up.
This guide from Cad Drafter is your practical map through that maze. It’s not theory, it’s real-world fixes. These include quick, proven solutions for the twenty most common CAD drafting mistakes. You’ll learn exactly how to spot them, correct them, and prevent them from ever coming back.
Why These Cad Drafting Mistakes Cost Time & Money
Here’s the thing about CAD errors, they don’t shout when they happen. They whisper. A small oversight, a missing tolerance, a layer out of place. Nobody notices at first. Then a few days later, someone on the fabrication team calls. Something doesn’t fit. A panel’s off. The shop drawing looks different from the model. Suddenly, that tiny mistake is costing hours, maybe days.
You’d be surprised how often this happens. Industry data shows that almost one-third of a project’s total rework time can be traced back to simple drafting mistakes. It’s not that drafters don’t know what they’re doing. On the contrary, it’s that projects move fast, and people rely on habits that worked fine on the last job. A forgotten unit setting here, a copied block there, and the whole thing starts to drift.
That’s why this guide exists. Not theory, not fluff and just clear, field-tested fixes you can apply right now. You’ll get priority tips, templates, and a ready-to-print checklist you can tape beside your monitor. It’s the same workflow our team at Cad Drafter uses to help clients eliminate rework before it snowballs.
And if you ever reach that “I’ve had enough of this file” moment, stop fighting the software. Contact our experts at Cad Drafter. We can jump in, clean it up, and help you set up a bulletproof CAD system for your next project.
The 5 Most Common Cad Drafting Mistakes
1. Starting A Drawing Without Setting Units & Scale
Short Description
This one’s a classic. You open a new drawing, throw in a few lines, maybe copy a block from another project and only later realize that nothing matches. Dimensions look strange, text scales weirdly, and blocks insert either too small or too large. The root cause? Units and scale were never set.
Why It Matters
When units aren’t defined, CAD assumes defaults. That might be inches, millimeters, or something completely different from what your collaborators use. It’s easy to overlook at first, but the pain shows up later in mismatched dimensions, exploded geometry, and model space chaos. On a construction or manufacturing job, even a small unit mismatch can mean wasted material, rework, and sometimes, a rejected submittal. Imagine a steel plate designed in millimeters being cut in inches.
Step-By-Step Fix
- Open your drawing and type UNITS in the command line.
- Set the correct Length Type (Decimal, Architectural, Engineering, etc.).
- Adjust Insertion Scale to match your project (Millimeters, Inches, etc.).
- Use a template file (.DWT) that already contains your preferred units and settings. This prevents rework later.
- Before inserting any external block or XREF, confirm their units using INSUNITS.
Quick Verification Test
Draw a line 100 units long. Check the dimension. If it reads differently than you expect (for example, 100 inches instead of 100 millimeters) your drawing units are still mismatched. Fix it before continuing.
Prevention
Make it a rule: no drawing starts without a unit check. Create a project-specific template that includes pre-set units, precision, scales, and layers. Add “Confirm Units” as the first item in your team’s QA checklist. If you work with multiple clients, maintain separate templates for each standard system (Imperial, Metric).
And if you’ve inherited a batch of messy legacy files, don’t burn hours fixing them one by one. Cad Drafter can help standardize your entire template library so every new project starts clean.
2. Using Inconsistent Or Missing CAD Standards (No Template Or Standards Manual)
Short Description
You insert a block, and suddenly it looks gigantic. Or worse, microscopic. A title block that once filled your sheet now sits in a corner like a thumbnail. What happened? The culprit is usually a scale mismatch between drawings that were created in different units or scaling systems. It is one of the quietest errors in CAD work because everything appears fine until you print or share the file.
Why It Matters
Scale mismatches can create a chain reaction that touches every stage of a project. A block drawn in inches and inserted into a millimeter-based drawing can instantly distort proportions, shift geometry, and throw off layout alignment. It also causes problems during collaboration because team members may not realize the scale conflict until it reaches fabrication or plotting. In the field, this translates into wasted material, delays, and costly rework. It is not just an inconvenience; it is an expensive oversight.
Step-By-Step Fix
- Before inserting anything, type INSUNITS and check the drawing’s insertion units.
- Use DWGUNITS to align the base units of the file you are working in with the one you are importing.
- When inserting a block, verify its scale in the Insert Block dialog and ensure the “Scale Uniformly” option is active.
- Test with a reference object of known size before adding multiple blocks.
- For consistent results, use a master template (.DWT) where units and scale have already been standardized.
Quick Verification Test
Create a small test block, like a 100 by 100 square, and insert it into your working file. If it comes in at an unexpected size, your unit settings are mismatched. Correct them before proceeding. Always perform this test before inserting large or complex geometry.
Prevention
Keep your scaling system uniform across all templates and team members. Define a single project standard for units and share that standard with everyone who touches the file. Store reusable blocks in a central library where their scales are predefined and verified. Add a reminder in your QA checklist labeled “Confirm block scale and insertion units.
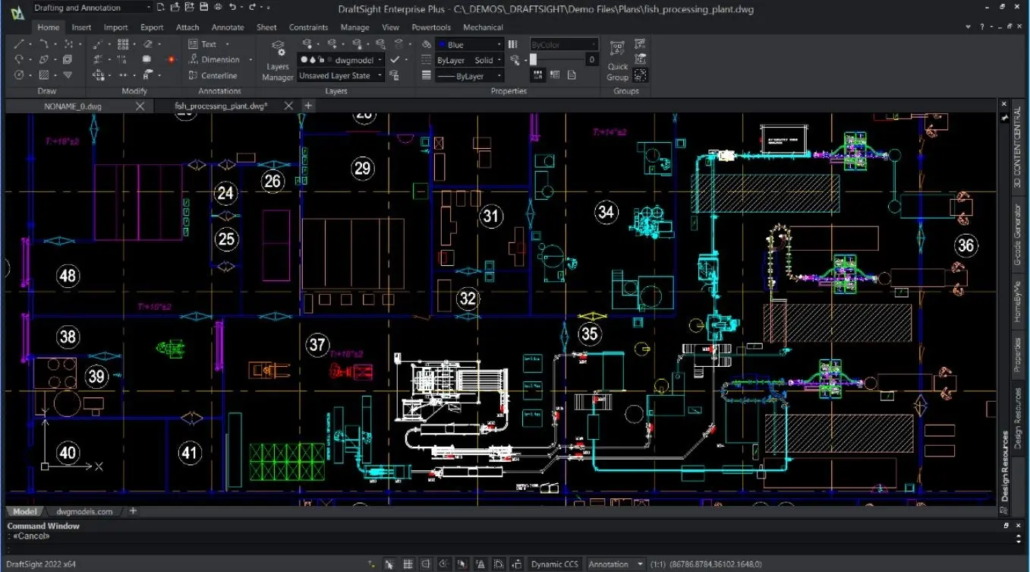
3. Throwing Everything On One Layer / Poor Layer Management
Short Description
It starts innocently enough. You just need to get something drawn, so you keep everything on Layer 0 or “Default.” A few quick lines, some text, maybe a block or two — and suddenly, you are staring at a web of overlapping geometry that is almost impossible to control. Nothing turns off cleanly. Plotting becomes unpredictable. Every revision takes twice as long.
Why It Matters
Layers are not just for organization. They are the backbone of visibility control, plotting accuracy, and collaborative work. When all geometry lives on one layer, editing becomes a guessing game. You cannot isolate electrical from mechanical, or annotations from geometry. If you try to plot, lineweights go haywire, hatches disappear, and certain objects print when they shouldn’t. It is messy, slow, and dangerous when multiple drafters share the same file.
Step-By-Step Fix
- Open the Layer Properties Manager and review all existing layers.
- Create a structured layer set that matches your discipline. Use an AIA-based naming format such as A-WALL, A-DOOR, E-LITE, M-DUCT, and so on.
- Assign colors and lineweights by layer, not by object.
- Use layer filters to isolate systems and simplify visibility when editing.
- Build a clean template (.DWT) that already includes your standard layer setup. That way, every new drawing starts with order instead of chaos.
Quick Verification Test
Freeze one layer and see if only the intended objects disappear. If unexpected geometry vanishes, something is on the wrong layer. Fix it immediately.
Prevention
Create and share a Layer Standards Manual with your entire drafting team. It should include naming conventions, colors, and plotting rules. Set up automated scripts or LISP routines that load layers instantly into new drawings. And before you send a file out, always run a LAYTRANS check to map foreign layers to your standards.
4. Incorrect Or Inconsistent Dimensioning & Tolerances
Short Description
A drawing can look beautiful on screen and still fail on the shop floor. The most common reason? Dimensions that are either incorrect, inconsistent, or missing tolerances. A missing decimal point, a wrong precision setting, or a copied dimension that was never updated can lead to real fabrication errors.
Why It Matters
In manufacturing and construction, dimensions are law. If a part or component is built to the wrong tolerance, it will not fit, align, or function properly. Even a tenth of a millimeter can ruin a joint or cause a costly re-cut. Inconsistent dimensioning styles across sheets also make clients and contractors lose trust. They see confusion where there should be clarity. That damages both your workflow and your reputation.
Say Farewell To All CAD Drafting Mistakes
Step-By-Step Fix (Commands, Settings, Templates)
- Type DIMSTYLE in the command line to open the Dimension Style Manager.
- Set up a standard style with correct text height, precision, arrow size, and tolerance display.
- Apply that style globally using DIMUPDATE or MATCHPROP to align all existing dimensions.
- Always double-check tolerance settings using TOLERANCE commands for critical dimensions.
- Save this setup in your template so every project starts with the right dimension style by default.
Quick Verification Test
Measure two similar objects using your current dimension style. If one reads differently in precision or format, your settings are inconsistent. Reapply your standard dimension style and test again until the results match perfectly.
Prevention
Maintain a single master dimension style for each client or discipline. Lock it inside your project templates and discourage manual overrides. Use annotation scaling to maintain readability across multiple viewports. And once your layout is ready, perform a final pass with your team using a dimension audit checklist before release.
5. Freehand Alignment Instead Of Using Snaps & Object Snap Tracking
Short Description
It seems harmless at first. You are in a rush, you just need to drop a few lines or align some geometry quickly, so you eyeball it. Maybe you even zoom in a little to get it close enough. It looks fine, right? But later, when someone else tries to edit or dimension that same drawing, nothing lines up. Lines that should meet are a fraction apart, circles do not share a true center, and your precision drawing suddenly behaves like a hand sketch.
Why It Matters
CAD software is built around precision. Every object connects through coordinates, not guesses. When you skip object snaps or tracking, even tiny misalignments can ripple into major problems. A gap of 0.05 units might not look like much on screen, but it can throw off dimensions, prevent accurate trimming, or cause hatch leaks and area calculation errors. The longer that error stays hidden, the more geometry it infects. Before you know it, nothing is truly square, and rework becomes painful.
Step-By-Step Fix
- Type OSNAP and make sure common snap modes are active — Endpoint, Midpoint, Center, Intersection, and Perpendicular.
- Check your OSMODE It should reflect the snap modes you rely on most.
- Turn on SNAP and GRID to help guide alignment visually.
- Enable ORTHO or POLAR tracking for straight or angular alignment.
- Use Object Snap Tracking (F11) to align points without drawing unnecessary construction lines.
- Save these settings inside your template so every new drawing inherits your preferred snapping setup.
Quick Verification Test
Try drawing a rectangle and then measure its diagonals using DIST. If both diagonals match exactly, your snaps are working correctly. If they do not, recheck your OSNAP settings. Another simple test: zoom in on an intersection you think is connected and use LIST to verify the coordinates. If endpoints do not share exact values, something is misaligned.
Prevention
Develop the habit of never drawing with snaps off. It saves you from hundreds of small fixes later. Set up a startup routine that checks your OSNAP, ORTHO, and POLAR settings automatically. Keep a note in your QA checklist labeled “Snaps verified before drawing.” If you manage multiple users, create a shared template that locks in consistent snap behavior across the team.
Quick Fixes & One-Click Settings
Every drafter needs a small set of quick commands. These are the ones that instantly clean, fix, or align a drawing when things start to feel off. Think of this table as your field companion. Each command here saves time, reduces rework, and keeps your CAD files behaving like they should.
| Command | Purpose / When to Use | Quick Macro or Shortcut | Pro Tip |
| UNITS | Defines your drawing units, precision, and insertion scale. Always run it before starting a new file or inserting blocks. | _UNITS | Pick the correct unit (mm/in) before anything else to avoid scaling nightmares later. |
| LAYER | Opens the Layer Properties Manager for controlling colors, lineweights, and visibility. | _LA | Create discipline-based layers like A-WALL, E-LITE, M-DUCT, and freeze layers by phase. |
| DIMSTYLE | Sets up dimension appearance and tolerance formats. Keeps drawings consistent across sheets. | _DIMSTYLE | Save your dimension style in your template so it loads automatically in new projects. |
| OSNAP | Enables precise snapping to endpoints, midpoints, centers, and intersections. | _OSNAP | Keep Endpoint, Midpoint, and Intersection on by default; toggle F3 when needed. |
| PURGE | Cleans out unused layers, blocks, and text styles to lighten file size. | _PURGE → “All” → “Yes” | Run after every major revision to remove old data. |
| AUDIT | Scans for file errors and repairs them automatically. | _AUDIT | A quick way to keep files stable before saving or plotting. |
| OVERKILL | Deletes duplicate lines, arcs, and overlapping objects. | _OVERKILL | Especially useful before exporting to other formats or creating XREFs. |
| XREF | Manages external references and linked drawings. | _XREF | Use relative paths so files stay connected when shared across systems. |
| SNAP / GRID | Keeps geometry aligned and movement uniform. | _SNAP / _GRID | Combine with ORTHO for perfect straight-line drafting. |
| POLAR / ORTHO | Controls angular and straight-line tracking for clean alignments. | _POLAR / _ORTHO | Great for aligning geometry without drawing extra construction lines. |
Tools, Plugins, & Resources
If you’ve been drafting for a while, you probably have your favorite shortcuts and plugins tucked somewhere on your toolbar. Still, there are a few tools that can quietly transform how you work. They don’t shout for attention, but they save hours, sometimes in the most unexpected ways. I’ve gathered a handful that professionals tend to rely on, not because they’re trendy, but because they simply make the job smoother.
| Tool / Plugin | What It’s For | Why It Matters | How It Fits Best Practices |
| Autodesk DesignCenter | Lets you drag layers, blocks, and dimension styles between files. | Reuses proven elements instead of redrawing from scratch. | Keeps consistency alive across every project sheet. |
| CAD Standards Checker | Scans your file for non-compliant layers, fonts, and text sizes. | Catches subtle mistakes before they reach production. | Locks your work to an internal standards manual. |
| Layer Manager Plus | Offers better filtering and layer sorting tools. | Handy when drawings balloon with dozens of layers. | Encourages structure rather than chaos. |
| ScriptPro | Runs the same command across a pile of drawings automatically. | Great for quick batch purges or updates overnight. | Reinforces repeatable automation habits. |
| DWG TrueView | Opens and plots DWG files without AutoCAD. | Ideal for clients who only need to view and print. | Maintains compatibility while reducing file risks. |
| LISP Routines | Mini scripts that handle repetitive edits and cleanup tasks. | Speeds up cleanup work that usually eats hours. | Embeds efficiency into everyday drafting. |
| Autodesk Vault | Stores and tracks drawing versions safely. | Keeps revision histories clean and traceable. | Supports responsible version control and file discipline. |
| Bluebeam Revu | PDF markup and collaboration tool for design reviews. | Simplifies feedback loops between drafters and engineers. | Strengthens review transparency and documentation. |
| Cad Drafter QA Toolkit | Custom scripts and templates created by our team. | Tailored to your standards and project needs. | Bakes best practices directly into your workflow. |
Faqs
What is the most common CAD drafting mistake?
Surprisingly, it’s not a technical command slip, it’s forgetting to set the right drawing units at the start. Everything else unravels from there. Dimensions go off, blocks come in at odd scales, and fabrication drawings end up needing rework. It’s a five-second step that saves entire days later.
How do I check drawing units quickly?
Type UNITS in the command line and glance at the insertion scale. If you’re working in millimeters but it says inches, stop right there and switch. Another quick check is to measure a known object. If a 10 mm plate reads as 0.3937, you know the file’s in imperial.
Should I use XREFs or bind everything?
Use XREFs when collaborating or working on large projects. It keeps files light and easier to update. Binding should be the final step before submission or archiving. That’s when you lock in all links and avoid missing references. Think of XREFs as live connections, and binding as sealing the deal.
How often should I run PURGE and AUDIT?
If you draft daily, run PURGE every week and AUDIT before issuing any drawing set. Large teams might do both automatically overnight. It’s like tidying your desk. If you skip it for too long, and small clutter turns into chaos.
What’s a basic layer naming convention?
A simple and professional one follows the AIA format: discipline-major-minor. For instance, A-WALL-EXTR for architectural exterior walls or E-POWR-MAIN for electrical power mains. The point isn’t memorizing codes; it’s clarity. Anyone opening your file should know instantly what’s what.
Can CAD mistakes cause manufacturing defects?
Absolutely. A tiny error in tolerance or scale can ripple into expensive material waste or misaligned assemblies. In industries like aerospace or fabrication, a 0.5 mm mismatch can trigger a full production delay. The best defense is peer review and a checklist before release.
What’s the fastest way to fix broken XREFs?
Open the External References Manager, right-click the missing file, and choose “Select New Path.” Always switch to relative paths afterwards so future moves don’t break the links again. If you’re managing many files, scripts can re-path them automatically.
How do I ensure consistent plotting across offices?
Standardize your CTB or STB files and share them on a network drive that everyone can access. That way, the same layer colors produce identical lineweights in every branch. It’s worth running a test plot before big deadlines
What Are The Next Steps
You’ve made it through the biggest traps in CAD drafting. If you’ve caught yourself nodding at a few of these, that’s actually a good sign. Awareness means you’re already halfway to fixing them.
Before you move on to the next project, take a few minutes to print this short checklist. Keep it near your monitor or tape it to your desk.
Quick Cad Drafting Checklist
- Confirm units and scale before drawing anything.
- Use a consistent layer structure and naming convention.
- Set up your dimension and text styles in a template.
- Keep OSNAP and tracking on for alignment accuracy.
- Run PURGE and AUDIT regularly to keep files clean.
- Use XREFs for coordination and bind only at the end.
- Save and version drawings with clear file names.
- Verify plot styles before printing or issuing sets.
- Always back up your project folder.
- Review drawings with a short QA checklist before sending them out.
If you follow just these steps, your workflow will stay sharp and organized. But if you’d rather have an expert team do the setup for you, Cad Drafter can take care of it.