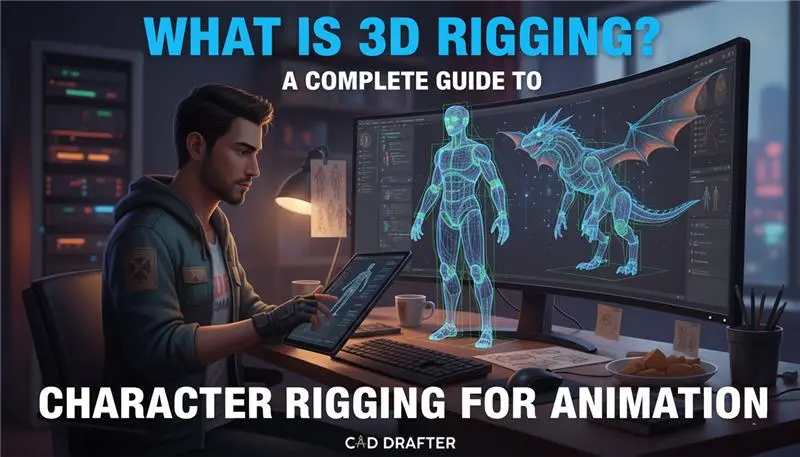
What Is 3D Rigging? A Complete Guide to Character Rigging for Animation
Walk into any modern film studio, game developer’s corner office, or VR lab, and you’ll spot something interesting. Characters no longer move because an animator manually tugs them around frame by frame. Instead, they rely on an invisible structure beneath the surface. In fact, some studios report that more than 70% of an animator’s workflow depends on the quality of the character’s rig, which is a detail most people never notice but instantly feel when it’s missing.
Rigging is the process of giving a digital model a skeleton and a set of controls so it can bend, twist, stretch, emote, or collapse into a heap; whatever the story demands.
This guide pulls back the curtain on that entire process. You’ll learn the fundamentals of rigging, what separates rigging from skinning, how IK and FK really work, how rigs are built step-by-step, which tools dominate the industry, and where rigging shows up beyond the movie screen. We’ll also walk through common problems, practical prep tips, and a set of FAQs you can skim at the end.
And if you’re working with raw CAD models that need to make the leap into animation or real-time engines, CAD Drafter can help you prepare them, cleaned, organized, and ready for a rig to drop in place.
What Is 3D Rigging?
3D rigging is the process of putting an internal structure inside a digital model so it can move. That’s it at the simplest level. You build a skeleton, add controls. Suddenly, it can bend an arm, tilt its head, or shift weight from one foot to another. Without this structure, nothing moves. No matter how impressive the model looks on the outside, it’s not functional without it.
A Simple Analogy
It helps to picture something familiar. Imagine a traditional puppet lying on a table. Without the wooden pieces and joints inside it, the puppet can’t do much. Once you attach strings and handles, though, it springs to life the moment someone tugs on it.
In rigging terms:
- Bones and joints → puppet’s internal frame
- Control handles → the strings and sticks the puppeteer grabs
- Animator → the person guiding those controls to create motion
One handle can influence several joints, or just one. Some setups behave in strange (yet deliberate) ways, depending on how the character is supposed to move.
The Actual Components
A functional rig usually includes:
- Joints/Bones: the digital “hinges” that define how each part rotates
- Controllers: shapes that the animator selects to move those joints
- Constraints: rules that prevent impossible or unwanted motion
- Deformation System: the layer that decides how the mesh behaves
Rigging vs Skinning
People often mix these two up, and it makes sense because both happen under the hood, and neither is flashy. But they’re not the same job at all. Rigging comes first. Skinning comes after. And the difference between them becomes obvious the moment a character starts moving and something goes wrong.
Rigging: The Structure
Rigging is the act of building the internal setup of joints, bones, and the control system. Think of it as constructing a digital exoskeleton. Once that’s in place, the model finally has something to rotate around. Without this structure, an arm can’t swing, a tail can’t whip, and a simple head turn becomes impossible.
Skinning: The Attachment
Skinning is where things get more temperamental. Here, the mesh is attached to the skeleton so it follows the joints properly. Move the elbow joint, and the forearm mesh should bend with it. In theory.
In practice, it bends weirdly, caves in, or balloons out until someone fixes it.
Common skinning tasks include:
- Adjusting weight paint so vertices react smoothly
- Fixing collapsing elbows or knees
- Cleaning areas where the mesh drags, pinches, or folds like wet paper
Some characters behave instantly. Others fight back like you’re trying to teach concrete to dance.
| Task | Rigging | Skinning |
| Purpose | Build the skeleton and controls | Attach mesh to skeleton |
| Main Parts | Joints, bones, controllers, constraints | Vertex weights, envelopes, deformation adjustments |
| When It Happens | Before any animation | After rig exists, before animation |
| Typical Problems | Misaligned joints, bad control setup | Collapsing joints, stretching, pinching |
| Who Handles It | Technical artists/riggers | Riggers or character TDs |
Core Technical Concepts
Rigging isn’t just about joints and handles. Under the surface, a few core systems decide whether a character moves cleanly or looks like a rubber toy that lost a fight. These concepts show up in almost every production environment, from film-level rigs to lightweight real-time setups.
FK vs IK With The Arm Example
FK (Forward Kinematics) is simple: rotate one joint at a time. Shoulder → elbow → wrist. It feels natural for posing a relaxed arm or anything that follows an arc. IK (Inverse Kinematics) flips the logic. You grab the wrist, move it somewhere, and the system figures out how the elbow and shoulder should rotate to reach that point. If you’ve ever seen a character plant a hand on a table and keep it there while the body shifts, that’s IK doing the heavy lifting. FK is sculpting; IK is problem-solving.
Corrective Shapes & Pose Space Deformers
Bodies don’t bend perfectly with just joints. A bent elbow collapses. A raised shoulder caves in. Corrective shapes kick in only during specific poses, like a sculpted patch that activates when an angle hits a certain threshold. Pose space deformers automate this behavior so the mesh looks like the joint has muscle and volume, not cardboard edges.
Facial Blendshapes
Faces are a different battlefield. Here, animators rely on blendshapes. These are hand-sculpted variations of the same face (smile, blink, frown) that can be mixed together. It’s not glamorous but incredibly precise, especially for micro-expressions.
Control Rigs & Performance
To keep all this usable, rigs get wrapped in a control system so animators push sliders or grab shapes instead of wrestling with hidden joints. In real-time engines, complexity becomes an enemy; heavy rigs tank performance. So parts get simplified, baked, or offloaded to GPU skinning to keep frame rates alive.
Explore The World Of 3D Rigging With CAD Drafter
Typical 3D Rigging Pipeline
A rig doesn’t arrive fully formed. It’s built in layers, and each stage quietly influences the next. The pipeline looks straightforward on paper, but in reality, it’s a cycle of tweaks, fixes, and “why is the elbow exploding again?” moments.
Model Cleanup
Everything starts with the mesh. No stray vertices. No overlapping edges. No bizarre normals pointing the wrong way. Clean topology isn’t just aesthetic! It decides how well the skin will deform later. If the face loops are sloppy or the knees have stretched quads, you’ll be fighting that mess the entire project.
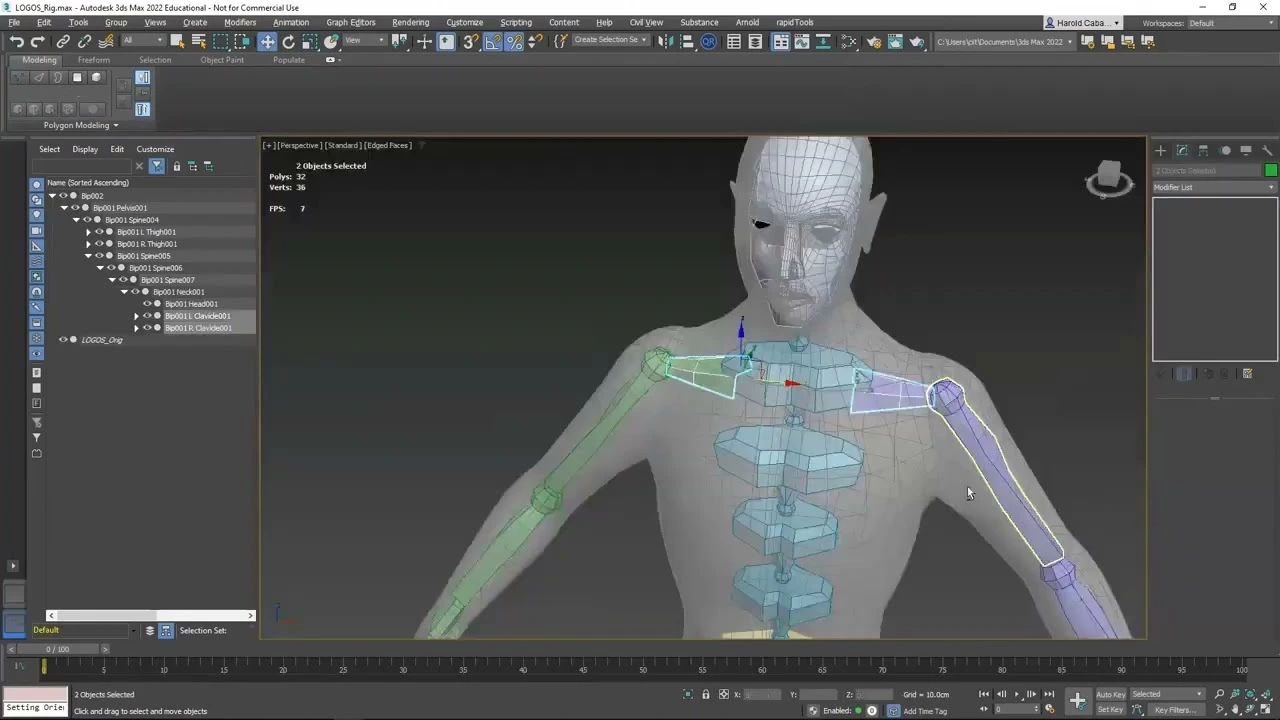
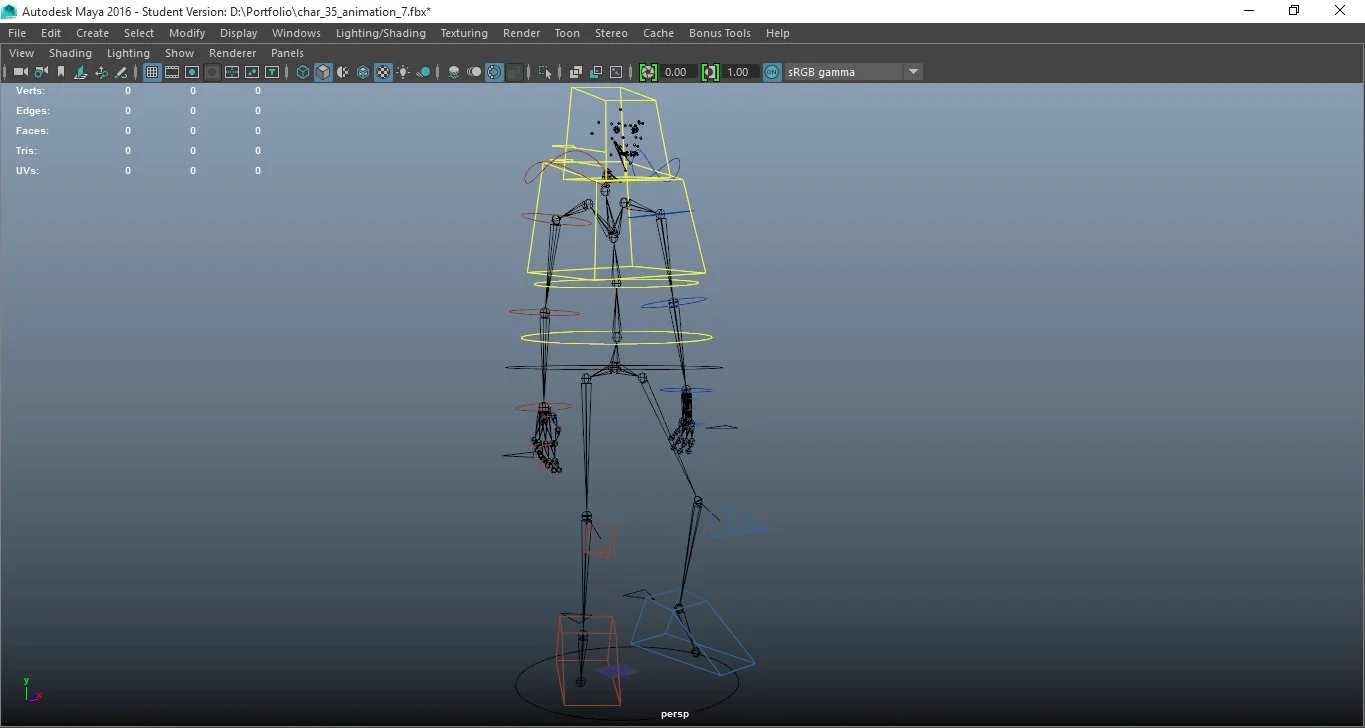
Skeleton Setup
Then comes the skeleton. A set of joints that mimic real-world anatomy or mechanical structure. Placement matters more than people think; a hip joint shifted even a centimeter can ruin every walk cycle. Limbs get proportional joint chains. The spine has enough segments to bend without turning into a noodle.
Joint Orientation
Orientation is the quiet villain. If the joint axes don’t point in consistent directions, rotations behave like chaos. Good rigs live or die by clean, predictable axes. You want the animator to rotate an arm without it flipping like a bad magic trick.
Skinning & Weight Painting
This stage takes patience. The mesh gets bound to the skeleton, and every vertex is assigned influence weights. Some areas (shoulders, wrists, hips) always need extra attention. You smooth weights, test motions, fix collapsing areas, smooth again, test again. It’s methodical but essential.
Controls & Constraints
This is where the rig comes alive. Control curves replace joints as the animator’s interface. Constraints tie everything together: IK handles for limbs, aim constraints for eyes, parent constraints for props, space switching for dynamic movement. If controls feel clunky or unpredictable, the whole animation process slows down.
Corrective Blendshapes
Once the rig moves, problem areas show themselves. The elbow caves in; the knee pinches; the shoulder crunches. Corrective blendshapes rebuild shape volume only in specific poses. It’s part art, part problem-solving, and necessary for believable deformation.
Rig Testing & Pose Library
Before anyone touches the rig, it gets tested. Extreme poses, subtle poses, stress poses, everything. Animators rely on a pose library to quickly test facial positions, hand shapes, or full-body stances. If a rig breaks here, it’s far better than discovering it in production.
Export to Engine / Workflow
When everything works, the rig gets baked, optimized, and exported. For real-time engines, that might mean pruning unused joints, simplifying constraints, converting controllers to animation-friendly skeletons, or applying GPU-friendly skinning.
Naming Conventions & Modular Rigs
One final note: naming matters. A clean naming system prevents chaos when debugging or scripting tools. Modular rigs (where limbs or components can be swapped) save huge amounts of time on large projects. They also make versioning safer.
Software & Tools: Industry Standard Choices
Autodesk Maya
Maya is still the backbone of most professional rigging pipelines. Studios lean on it because its joint system, constraints, and node-based architecture are predictable and deep. You can build complex character rigs, create animator-friendly interfaces, and script custom tools using MEL or Python without fighting the software. Maya’s graph editor and hypergraph make the underlying network visible, which matters when debugging odd deformation issues or constraint loops. It’s not lightweight, and sometimes it behaves like it woke up on the wrong side of the CPU, but riggers tolerate that because the control it offers is unmatched.
Blender
Blender has come a long way from being the “free alternative.” Its Rigify system, custom bone shapes, and modifier stack give riggers solid control. The workflow feels different from Maya. Some tools are tucked away, and some concepts behave in slightly quirky ways. But once you understand the logic, you can build rigs that hold up in production. Blender’s fast viewport performance and sculpting tools help during corrective shape work. Many indie teams rely on it because it delivers serious capability without draining budgets.
Houdini
Houdini approaches rigging like everything else in the program: procedural first, manual second. You can create rigs that rebuild themselves when geometry changes, which is a lifesaver for characters still in development. Its KineFX system allows joint manipulation directly on geometry with node-based editing. It’s extremely powerful, though not always friendly for beginners. Still, when you need a rig that adapts, regenerates, or fits into a simulation-heavy pipeline, Houdini is the tool riggers reach for.
3ds Max & Other Tools
3ds Max remains common in game studios, especially for hard-surface rigs and mechanical setups. Its CAT and Biped systems offer fast starting points for humanoid rigs, though they sometimes require cleanup to match modern workflows. Other niche tools (MotionBuilder, Modo, and specialized character editors) fill gaps depending on project needs. None dominate the rigging world like Maya, but they remain valuable in specific pipelines, particularly where legacy assets still matter.
Auto-Riggers & Plugins
Auto-riggers speed up the grunt work by generating full skeletons, control systems, and basic weight distributions automatically. They don’t replace a technical rigger, but they’re useful for rapid prototyping or background characters. Plugins can add motion-capture retargeting, muscle systems, space-switching features, or smarter constraints.
Where Rigging Is Used | Industries & Real Examples
Rigging isn’t confined to one corner of the digital world. Anywhere movement is needed, a rig is quietly doing the heavy lifting behind the scenes.
Film/VFX
In film, rigs are often extremely detailed. Think blockbuster creatures with dozens of muscles, multiple tails, or hundreds of facial controls. Each eyebrow, lip, and eyelid might have its own controller. Rigs in VFX must survive high-resolution scans and extreme close-ups. Animators rely on rigs that behave predictably under hundreds of frames, because a single glitch could mean hours of cleanup. Big productions often spend weeks just perfecting deformation in complex shots.
AAA Games and Indie Games
Games present a different challenge. Real-time performance is critical. Rigs are lighter, optimized, and sometimes baked to animations so the GPU doesn’t choke. AAA games might have full IK/FK systems with constraints, but every bone, every influence, is scrutinized for efficiency. Indie games often use auto-riggers or simplified skeletons, sometimes sacrificing subtle motion for speed. Yet even simple rigs can make characters feel alive if well-executed.
AR/VR
In augmented or virtual reality, rigs must work under unusual constraints. Motion tracking, hand controllers, and positional mapping create situations where joints and IK chains are constantly recalculating. The rig must be flexible and forgiving, yet precise enough to prevent immersion-breaking glitches.
Advertising
Product or commercial animation often calls for short but highly polished rigs. A bottle, sneaker, or car may “dance” or bend in impossible ways. These rigs are often hybrid: simple skeletons for basic movement, extra controllers for creative flourishes. The goal isn’t realism! It’s impact and visual clarity.
Product Visualization
Architectural and industrial visualization also use rigs, but in subtle ways. Machinery, hinges, conveyor belts, and elevators need movement to explain function. Even doors or windows can have skeletal controls to demonstrate motion. These rigs are usually lighter and more mechanical than organic.
Film vs Real-Time Rigs
Film rigs prioritize flexibility and precision; real-time rigs prioritize efficiency and speed. One is about perfection for the eye; the other is about survival under strict hardware limits. Animators working in either domain rely on rigs that feel natural but perform differently depending on the constraints of the medium.
Common Rigging Challenges & How Pros Solve Them
Rigging rarely goes as planned. A skeleton can be perfect, controls in place, and yet something still breaks when you try to move the character.
Collapsing Joints
Elbows folding wrong. Knees pinching. Shoulders crumpling. Happens all the time. Usually the problem is uneven weight on the mesh or joints that aren’t aligned properly. Fixing it takes weight painting, sometimes adding helper joints, sometimes creating corrective shapes that only activate in certain poses. Frustrating. But necessary.
Facial Deformations
Faces lie. You pull a mouth corner, and something else twists unexpectedly. Eyelids droop, cheeks flatten, lips fold strangely. Blendshapes and pose-specific corrective shapes help. They fix the odd angles. Too many corrections and the face becomes stiff. Too few and it collapses.
Constraint Conflicts
Two constraints fighting. The hand moves the way you want but rotates backward. The head turns, but not where it should. Solving it means isolating conflicting layers, simplifying hierarchies, sometimes baking transforms in the middle of the rig. It’s trial and error.
Performance Issues
A rig that works fine in the 3D CAD software can kill a game engine’s framerate. Too many joints. Too many deformations. Fixes include reducing joint counts, baking some controllers into animation, using GPU skinning. The rig has to survive the engine, not just look nice in the viewport.
Collaboration Problems
Rigs live in a messy ecosystem. Modelers, animators, engine programmers all touch the file. One tiny mismatch in naming or orientation can break everything. Clean names, modular parts, and early testing reduce chaos but never eliminate it entirely.
Rigging is messy. Solutions exist, but you need patience, attention, and a willingness to experiment. Some rigs behave perfectly the first time. Most don’t.
How to Prepare Your 3D Model for Rigging
If the model isn’t ready, rigging becomes a nightmare. Every small issue compounds once joints start moving. Preparation isn’t glamorous, but it saves hours of frustration later.
Topology Matters
Edge flow isn’t just about clean loops; it dictates how the mesh bends. Quads are preferred almost universally. Triangles and n-gons can create pinching, collapsing, or weird wrinkles when the rig moves. Pay attention to shoulders, knees, elbows, and facial loops because they need smooth flow to behave predictably.
Clean Naming & Zeroed Transforms
Every vertex, joint, and object needs a logical name. A misnamed joint can confuse scripts or animators. Zeroed transforms mean the position, rotation, and scale start at a known, neutral state. Without this, controllers can misbehave and constraints break in subtle, hard-to-find ways.
Freeze Transforms & Apply Scale
Before rigging, freeze transforms on all objects and apply scale. It prevents unexpected stretching or misalignment once the skeleton is added. The mesh behaves more predictably in both animation software and game engines.
File Formats for Handoff
Keep the handoff simple. OBJ for clean geometry. FBX for full skeleton and mesh setups. These formats are widely supported, reduce compatibility issues, and make it easier to import into animation or real-time engines.
Rig preparation is about discipline. A messy model slows everyone down, creates headaches, and wastes time. CAD Drafter can handle the cleanup for you. We organize topology, fix transforms, and deliver models ready for rigging or animation. So, you can start without worrying about hidden problems.
Costs & Timelines
Rigging is not a flat price thing. It depends on the character, the mesh, and what you expect it to do. Some rigs are quick. Others take forever.
A basic rig might have simple joints, minimal facial controls, and no fancy secondary movement. An experienced rigger could finish it in a few days. It’s functional, nothing more.
An advanced rig is a different story. Hundreds of facial blendshapes. Extra joints for tails, wings, or mechanical parts. Complex control systems for animators. Corrective shapes for elbows, shoulders, and knees. That can take weeks. Sometimes longer if the engine has strict performance limits.
What changes the cost the most? Facial complexity. Number of control handles. How polished you need it to be. Engine requirements. A rig for film isn’t the same as one for a game. One needs detail; the other needs speed.
Because every model is unique, estimating without looking at it is guessing. The best move is to request a quote. Let a rigger see your model, understand the needs, and give a realistic timeline and price. No surprises.
Conclusion
Rigging is the backbone of any animated or moving 3D model. Without it, even the most detailed character is static. Movement, expressions, and believable motion all rely on a well-constructed rig. Errors in rigging show up immediately during animation and can slow production to a crawl.
CAD Drafter prepares your models so they are rig-ready. We clean meshes, organize topology, zero transforms, and deliver assets optimized for animation, game engines, or real-time applications. From scan-to-CAD models to fully prepared animation files, our team ensures your project starts without hidden issues, giving animators a clean slate to work efficiently.
FAQ
1. What is 3D rigging?
3D rigging is adding an internal skeleton and control system to a digital model so it can move. It transforms a static mesh into an animatable character, allowing limbs, joints, and expressions to respond predictably.
2. How is rigging different from skinning?
Rigging builds the skeleton and control system. Skinning attaches the mesh to that skeleton so it deforms correctly. Rigging defines motion potential; skinning defines how the surface reacts when joints move.
3. Which software is best for character rigging?
Autodesk Maya is widely used for professional rigs. Blender offers strong free options. Houdini excels in procedural rigging. 3ds Max is common for mechanical or game rigs. Choice depends on pipeline needs and project requirements.
4. How long does it take to rig a character?
A simple rig can take a few days. Complex rigs with detailed facial controls, corrective shapes, and animation-ready features can take several weeks. Timelines depend on mesh complexity, rig detail, and performance requirements.
5. What file formats are preferred for rigging?
OBJ is common for clean geometry. FBX works for skeletons and mesh combined. These formats are widely supported across 3D software and engines, making handoffs smoother and avoiding import errors.
6. Can CAD models be rigged for animation?
Yes. CAD models can be prepared for rigging by cleaning topology, reducing unnecessary geometry, and organizing structure. Once ready, they can support animation, motion studies, or real-time engine use without breaking during deformation.
7. Does CAD Drafter offer rigging or rig-preparation services?
CAD Drafter specializes in preparing rig-ready models. We clean geometry, fix transforms, optimize topology, and deliver files ready for animators. Scan-to-CAD models, animation-ready assets, or game engine-ready skeletons are all part of our service.